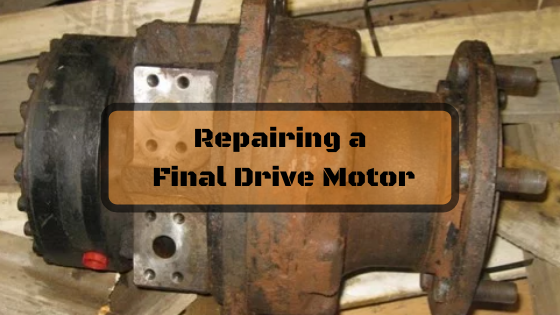
![Repairing a Final Drive Motor [VIDEOS]](https://cdn11.bigcommerce.com/s-lbnln0ppxx/images/stencil/original/uploaded_images/repairing-a-final-drive-motor.png?t=1590104902)
Repairing a Final Drive Motor [VIDEOS]
May 21st 2020
Helpful Guidelines for Repairing Final Drives and Track Motors
Here are some tips and guidelines to help you with repairing your final drive motor.
Contents:
Removing Your Final Drive Motor
Disassembling Your Final Drive Motor
Parts That Always Need to be Replaced
Parts That May Need to be Replaced
Surfaces and Lapping
Replacing Final Drive Gears and Shafts
Working with Brake Assemblies
Issues with External Hydraulics
Reassembling the Final Drive
Conclusion
Removing Your Final Drive Motor
Before you pull your final drive motor, start by cleaning up the area where the final drive is installed. This means breaking loose any hardened debris and clearing out the dirt and grime that has gathered. While this cleaning may seem unnecessary, it will go far in not only helping you see what you’re doing but it also goes for preventing hydraulic contamination.
Next, before you remove the hoses, tag them so you can quickly reattach them to the correct ports without confusion later on. Some of our Final Drive Parts customers use strips of colored wire, multi-colored plastic tie, or chalk marks to accomplish this. The important thing is to find a way that works well for you.
The video below is a good example of how to actually go about removing (and later reinstalling) a final drive from your machine.
Disassembling Your Final Drive Motor
Before you start taking your final drive apart, you really need to clean up the outside of it. This includes,as much as possible, getting rid of the hardened debris, scaling, dirt, rust, mud, sand, concrete dust, etc. That way, you minimize the chances of introducing damaging contamination to the inside of your final drive motor.
Once that is complete, your next step is to remove the cover plate. Now, that can be tricky -- especially for KYB / Kayaba final drives like the one shown below. You may need to have some cheater bars and other non-standard tools in order to get your final drive opened up.To get the hubs apart, there’s a good chance that you’ll need an arbor press.
Once you’ve removed the cover plate, pay close attention to the order in which you remove the parts. You might want to periodically take pictures for reference later on. This can make the reassembly process much easier and quicker. You might also make some marks to remind yourself how certain parts are aligned with each other.
Parts That Always Need to be Replaced
Once you’ve disassembled your final drive, you will need to replace the seals. Keep in mind that seals have a very limited life span and need to be replaced as soon as they start to leak. You cannot reuse seals -- it is too risky for your final drive motor. The same is also true for any gaskets you encounter.
It’s not hard to track down seal kits for final drive motors. This includes the main seals, also called floating face seals or duo cone seals. Sometimes the main seals can be installed without specialized tools but you may need a rubber mallet or a specialized tool to make the installation go easier.
Parts That May Need to be Replaced
There are some parts in a final drive motor that eventually need to be replaced. These include the main bearings, gear bearings, gears, and sometimes the draft shafts and couplers. Seals and bearings have to be replaced more often than any other part. If you don’t replace them once they wear out, you’re going to have leaks and other serious damage.
Because of the power and torque they transmit, gears, gear bearings, and couplers take a great deal of abuse and experience significant wear. When they start to fail, you definitely want to replace them.
Surfaces and Lapping
There are some parts that suffer surface damage but don’t have to be replaced. If the damage is not extensive, parts such as distributors can be restored to factory specifications via lapping.
The lapping process uses abrasives to restore flatness and surface finish, although the necessary precision can be hard to achieve without a quality lapping table and some experience. On the hand, there are surfaces on some parts that you can restore through hand lapping.
Replacing Final Drive Gears and Shafts
The tip of gear teeth should always have a flattened surface, not a pointed one. If your gears have pointed teeth, it’s time to replace them. The same thing is true for the splines on the upper and lower drive shafts. If the splines wear away to a point, the drive shaft can’t mesh with the coupling and your final drive will either be very weak or stop turning altogether.
If you’re looking at the planetary gear set, check the lower gear bearing to see how much play it has. If there’s too much play, that's a sign it needs to be replaced, too. Finally. keep in mind that you never want to just replace one gear -- if one gear fails, the gear set is about to go, too. By replacing the set you’ll save yourself time and effort later on.
Working with Brake Assemblies
If your final drive has brakes, then you will also need to check out the brake assembly. The component that experiences the most wear in a brake assembly is the brake disk pack. Fortunately that is not difficult to replace. Make sure you use the specified height or, if you aren't sure what that is, copy the order (and count) for the brake discs and spacers that you removed. And don’t forget to replace the brake seal!
Issues with External Hydraulics
Something else to keep in mind is our hydraulic lines and hoses. They may need adjustments, rerouting, repairs, or replacement if a leak has developed. Remember to avoid tight bends and curves, and fix or replace leaking hoses right away. If a hose is rubbing against the machine or is touching something that runs extremely hot, you should install a protective guard over it.
If what led to the repairs was a catastrophic failure, you should
flush the hydraulic system. For example, if the failure generated metal chips and slivers or if a seal ended up inside the unit, you need to flush the system to prevent further damage from that type of contamination. Now keep in mind that flushing is more than just changing out the fluid. Flushing your hydraulic system means you are going to purge it of the all old fluid, contaminants, and sludge.
Reassembling the Final Drive
When it comes time to put everything back together, refer back to the pictures you took, any schematics and diagrams you have on hand, and alignment markings you made at the beginning. If there are torque requirements for certain bolts, follow those guidelines. Finally, you might want to consider using Loctite threadlocker to keep critical bolts in place.
Conclusion
Some final drive repair and maintenance tasks are simple enough for you to do with the tools in your shop. However, if you feel like a repair is too much for you to handle or you just don't have the time to deal with it, don't hesitate to contact an expert.