Checking and Changing the Oil in a Final Drive
Dec 21st 2017
The Importance of Final Drive Maintenance
Did you know that a general rule of thumb is that the life of your final drive gearbox is directly proportional to how frequently the oil is changed? That’s why one of the important maintenance tasks for a final drive is to regularly check the oil on the planetary side. Ideally, you should check the oil level about once every 100 hours of operation, and change the oil out at least once a year. In this article, we are going to talk about how to check the oil level and change out the oil in your final drive.
Checking the Oil in a Final Drive
Here’s how to check your gear oil level:
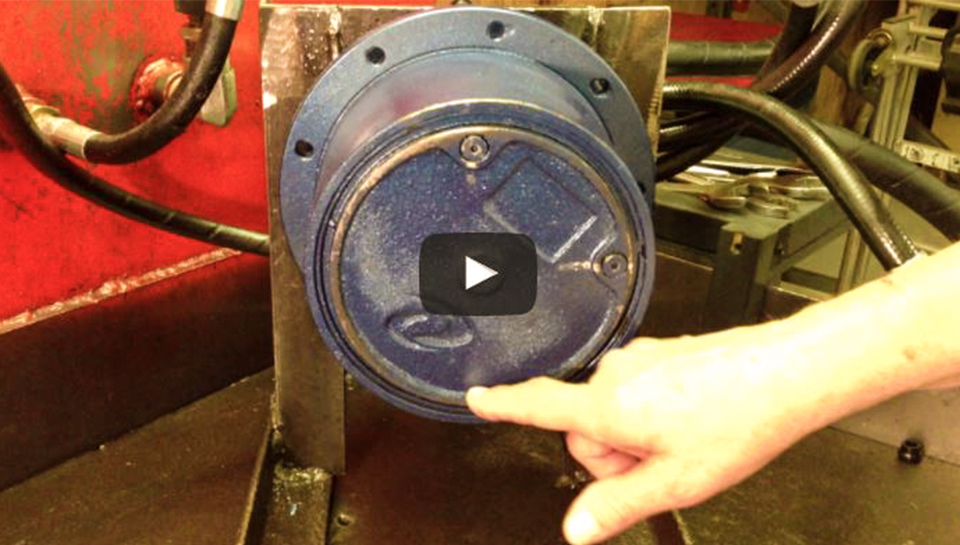
- When you look at the cover plate of your travel motor, you’ll notice two or possibly 3 plugs. Arrange your final drive so that one plug is at the 12 o’clock position and the other is either at the 3 o’clock position or the 9 o’clock position.
- Clean out any debris, dirt, mud, sand, soil, etc. from around the plugs.
- You may need to strike the plugs with a hammer to loosen them.
- Remove both plugs for venting purposes.
- If the drive has sufficient oil, the oil will be level with the 3 o’clock (or 9 o’clock) opening, with just a small amount draining out.
- If the oil is low, then you need to add additional oil through the 12 o’clock opening until it begins to run out at the 3 o’clock (or 9 o’clock) opening.
- Once you have finished topping off the oil, replace both plugs.

Changing the Oil in a Final Drive
Now let’s talk about how to change out the gear oil, also known as gear lube in your travel drive or final motor. Here’s the process:
- If you are going to drain the oil, it’s best to do so while the oil is warm because that will make it much easier to drain (the oil is very viscous).
- Arrange the final drive so that the plugs are in the 3 o’clock (or 9 o’clock) and the 6 o’clock position.
- As before, clean out any debris from around the plugs. You may need to strike the plugs with a hammer to loosen them in order to remove them.
- Open both plugs. The 3 o’clock (or 9 o’clock) opening is for venting while the 6 o’clock opening will allow the oil to drain out. It’s best to remove the bottom plug first, then slowly remove the top plug. How far you loosen the top plug will at least initially affect how fast the oil drains out.
- As the oil is drained out, make sure there are no metallic parts in the oil. The presence of metal flakes in the oil is indicative of a problem inside the gear hub.
- When you are ready to add the fresh oil, arrange the final drive so that the openings are in the 12 o’clock and 3 o’clock (or 9 o’clock) position. DO NOT mix different types of oil.
- Add the fresh oil through the 12 o’clock opening until it begins to run out the 3 o’clock (or 9 o’clock) opening.
- While you are adding oil, take a moment to check for leaks around the main hub mechanical seal (it’s located between the sprocket and the track frame). If you see oil leaking from this area, it could indicate a much more serious problem. You need to stop the machine and have the final drive checked.
- Once you’ve finished adding the oil, replace the plugs.
A good rule is that you should change the oil out about once a year.

Conclusion: Checking and Changing Gear Oil
The importance of regularly checking and changing the gear oil in your final drive or travel motor cannot be overstated. This type of preventative maintenance can save you thousands of dollars spent on repairs and money lost when your equipment is down.